Here are the four easy steps steps for creating a pay run in Xero.
1. Prepare employee data
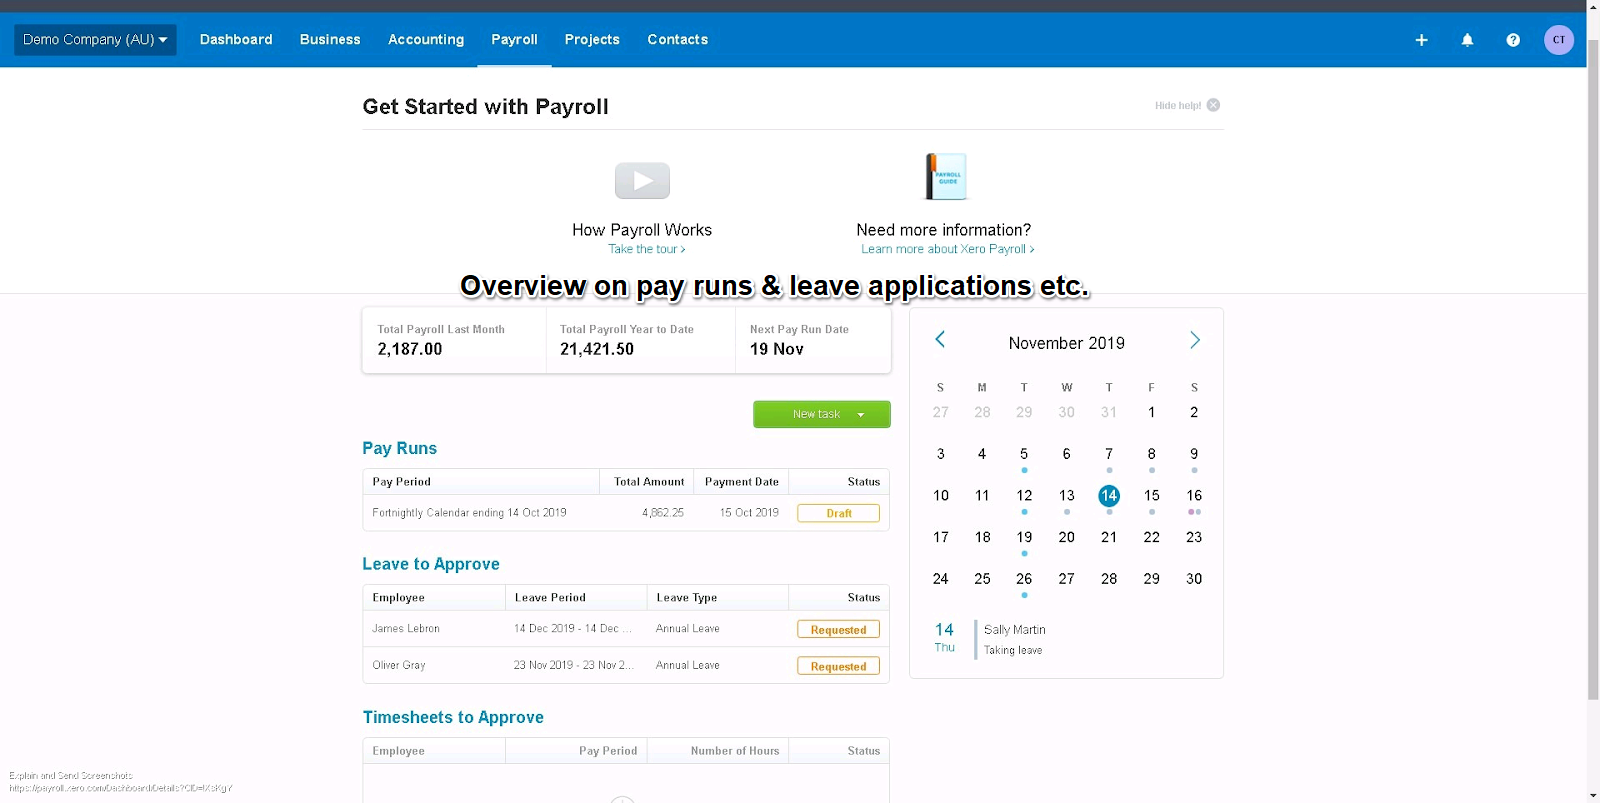
Information about your employees and payroll history is in your payroll tab. If this is your first payrun in Xero we recommend that you check your payroll data prior to preparing the payrun.
If you select the overview you will find your draft pay runs, pay runs that have been created, pending leave applications for your employees etc.
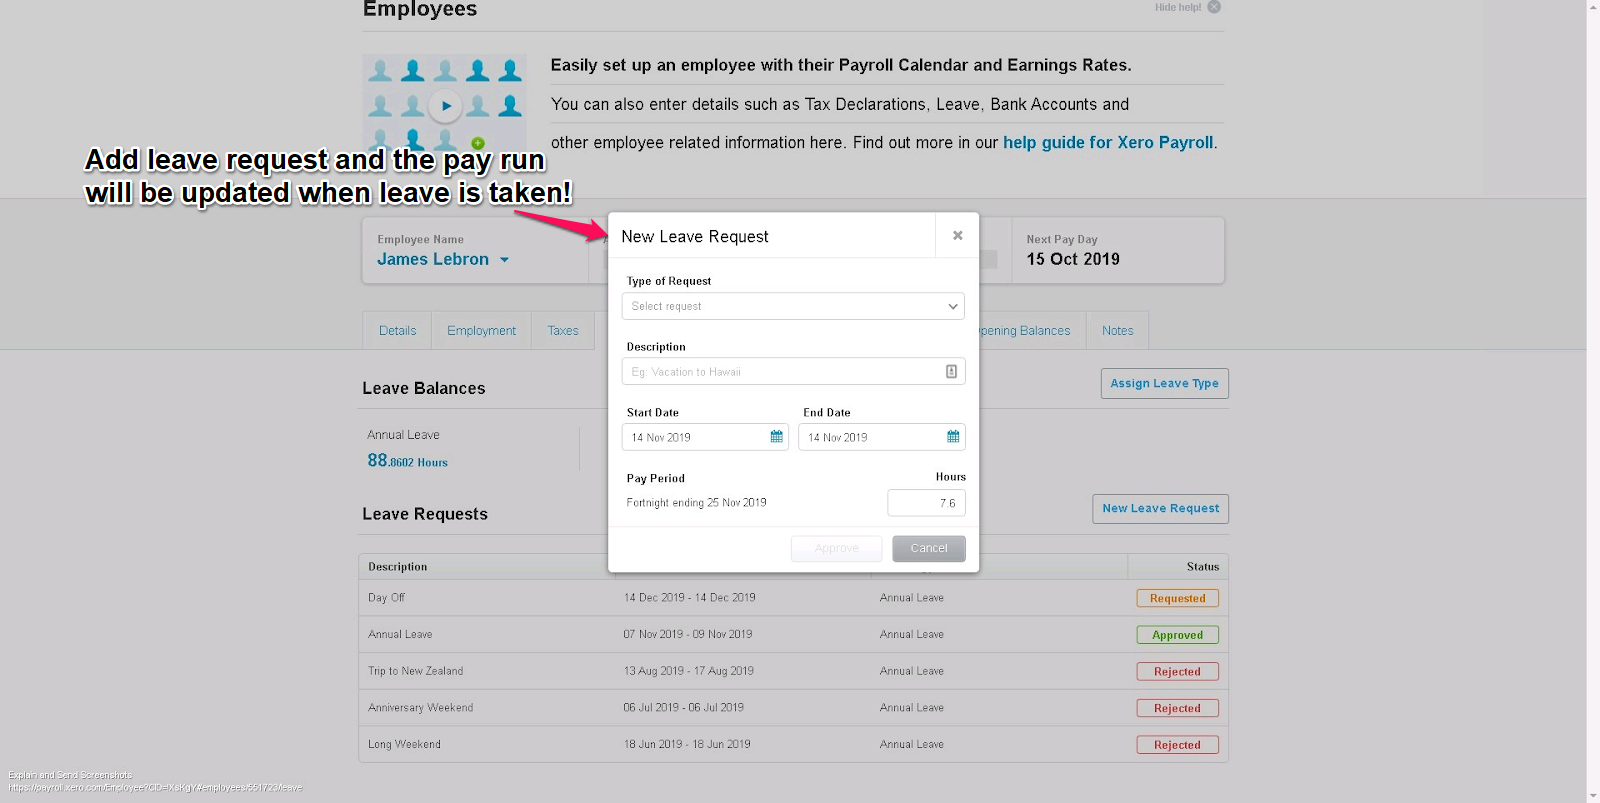
If there is an employee that is taking leave please add by:
- Select the payroll tab
- Select “Employees”
- Click on the employee that is taking leave
- Select the “Leave” tab by clicking on it (fourth tab from the left)
- Please press on the button “Add Leave Application”
- Then fill in the information:
- What kind of leave is the employee taking (Annual leave, Carer’s leave etc)
- Name the leave, for example “Trip abroad”
- Add a description
- Select the “Start day” and the “End date” of the leave.
Xero calculates the hours taken for that period you’ve chosen. If this is not correct just type in the hours it should be instead. Once correct please Save.
When you have added a leave application and you create the pay run for these dates Xero will automatically deduct the hours on the payslip for this employee.
If you want your employees to be able to add a “Leave Application” you can invite them to the employee portal.
2. Creating the Payrun
- Select the payroll tab
- Select the “Pay Run” tab
- Click on the “Add Pay Run” button
- Select your calendar
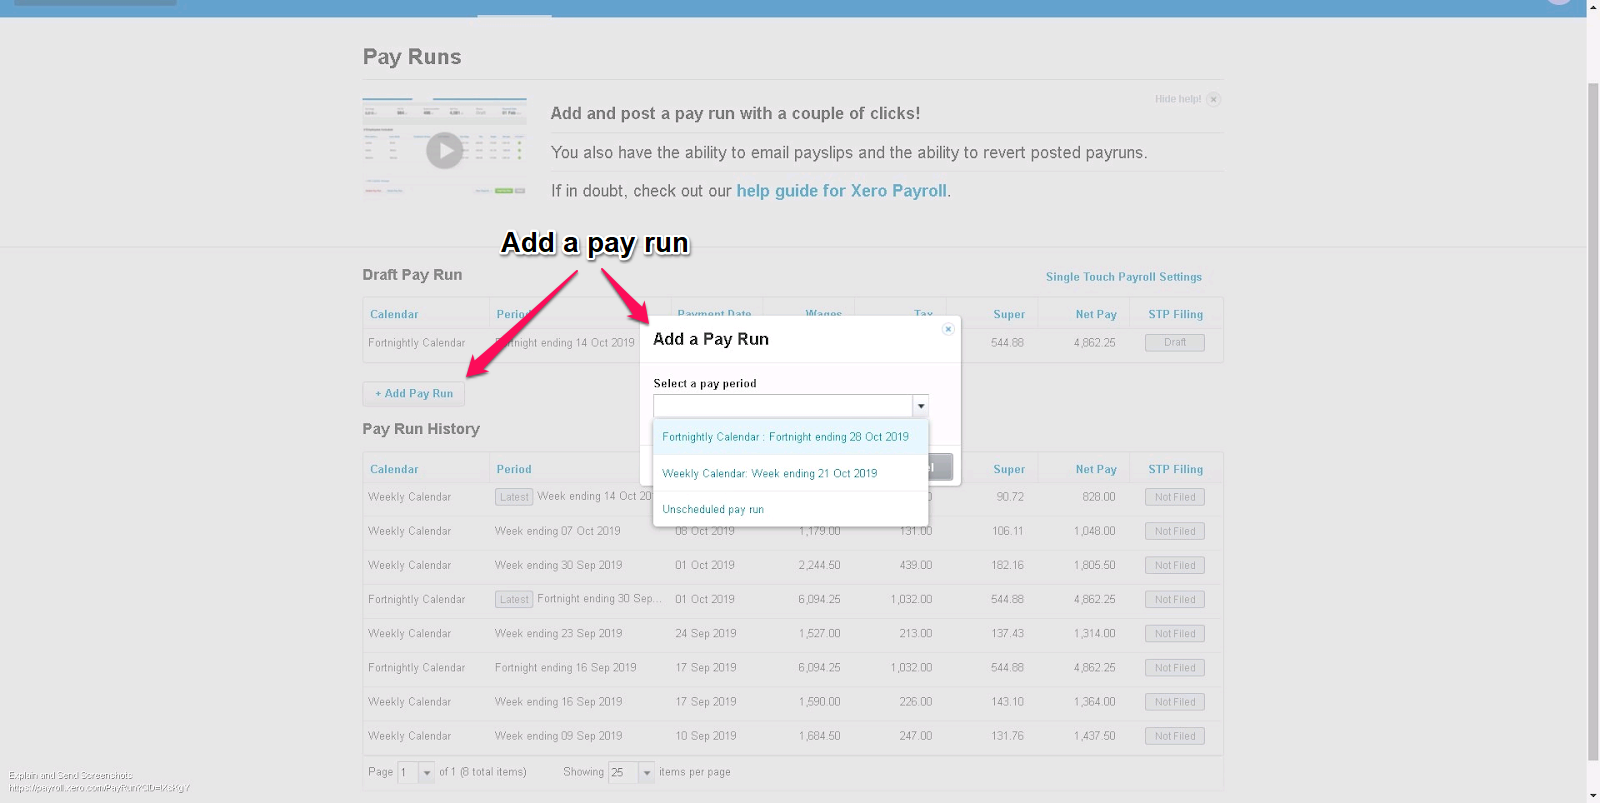
You will now see that a draft pay run has been created.
If there are any employees that you want to exclude you will have to untick the green round tab “Included” and the employee will automatically be excluded from this pay run.
If there is someone you have to change the details on, for example hours, you will have to click on the employee, make the changes and then please press on the “Save” button. To find your way back to the draft please press on the blue marked pay run text under the payroll tab and it will take you to the draft overview again.
Once you have reviewed all employees and everything is as you want it please press on the green button “Post Pay Run”. The pay run will now be created.
3. Finishing the Pay Run
You now do the following by clicking on the “Pay Run Options” button:
- Email the payslips (If an email address is missing you will have to first enter it (open up a new window) go to the payroll tab, choose “Employees”, click on the employee to add their email address, save and it will now get updated when you refresh the data in the payrun window (press F5) and then click on the “Pay Run Options” again and email the payslips.)
- If you are using Xero to pay the staff you will have to press “Download ABA” and that is the file you will import into your bank to be able to make the batch payments for the staff. Please ensure that your bank account is enabled to create ABA files.
4. Applying Payment
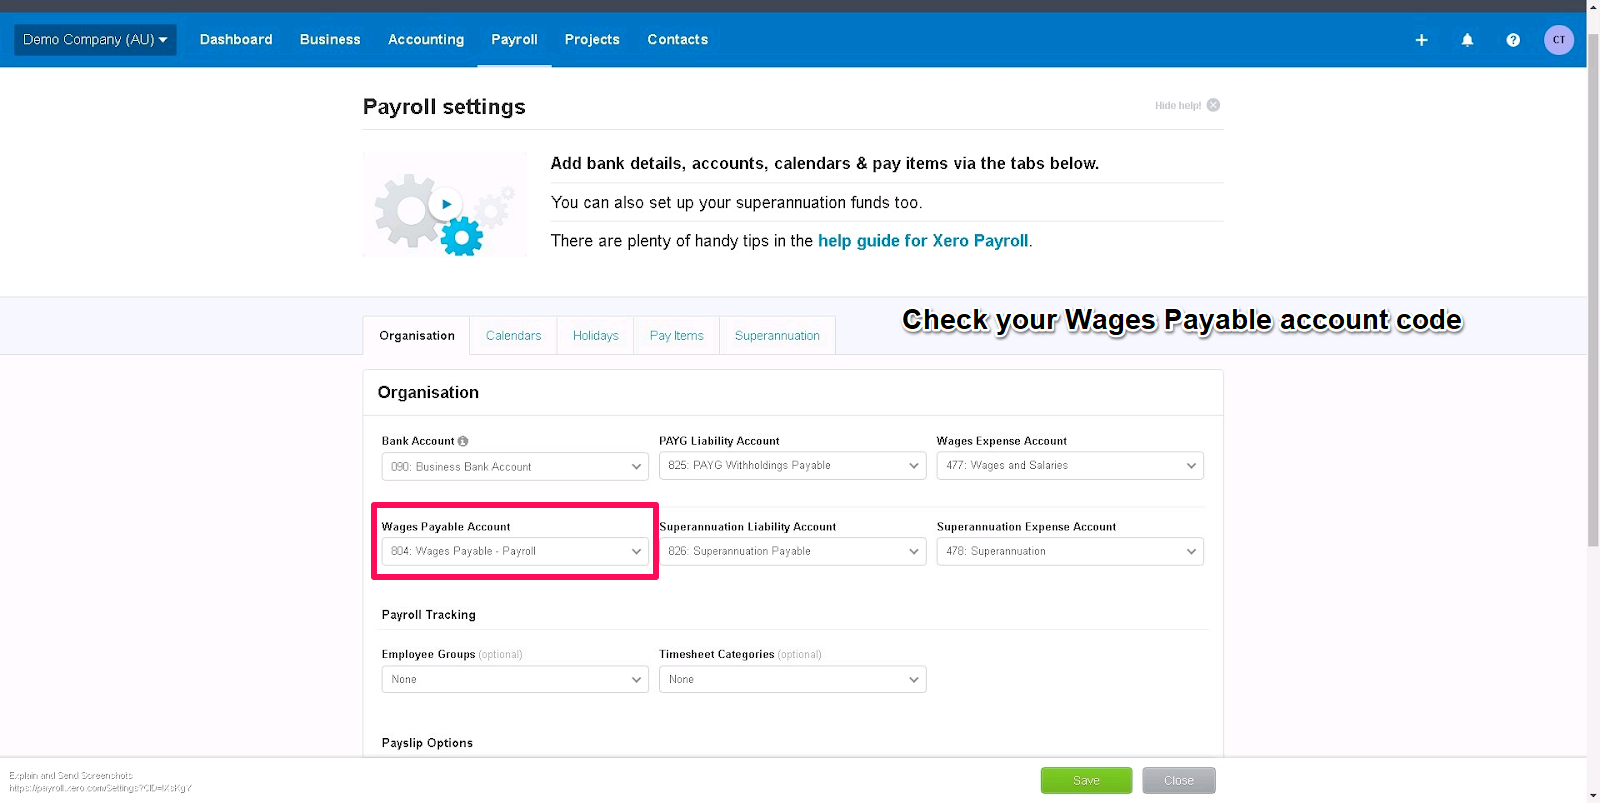
The wage payable amount will sit on the balance sheet as a liability until the payment is coded from the bank account and applied against the liability account.
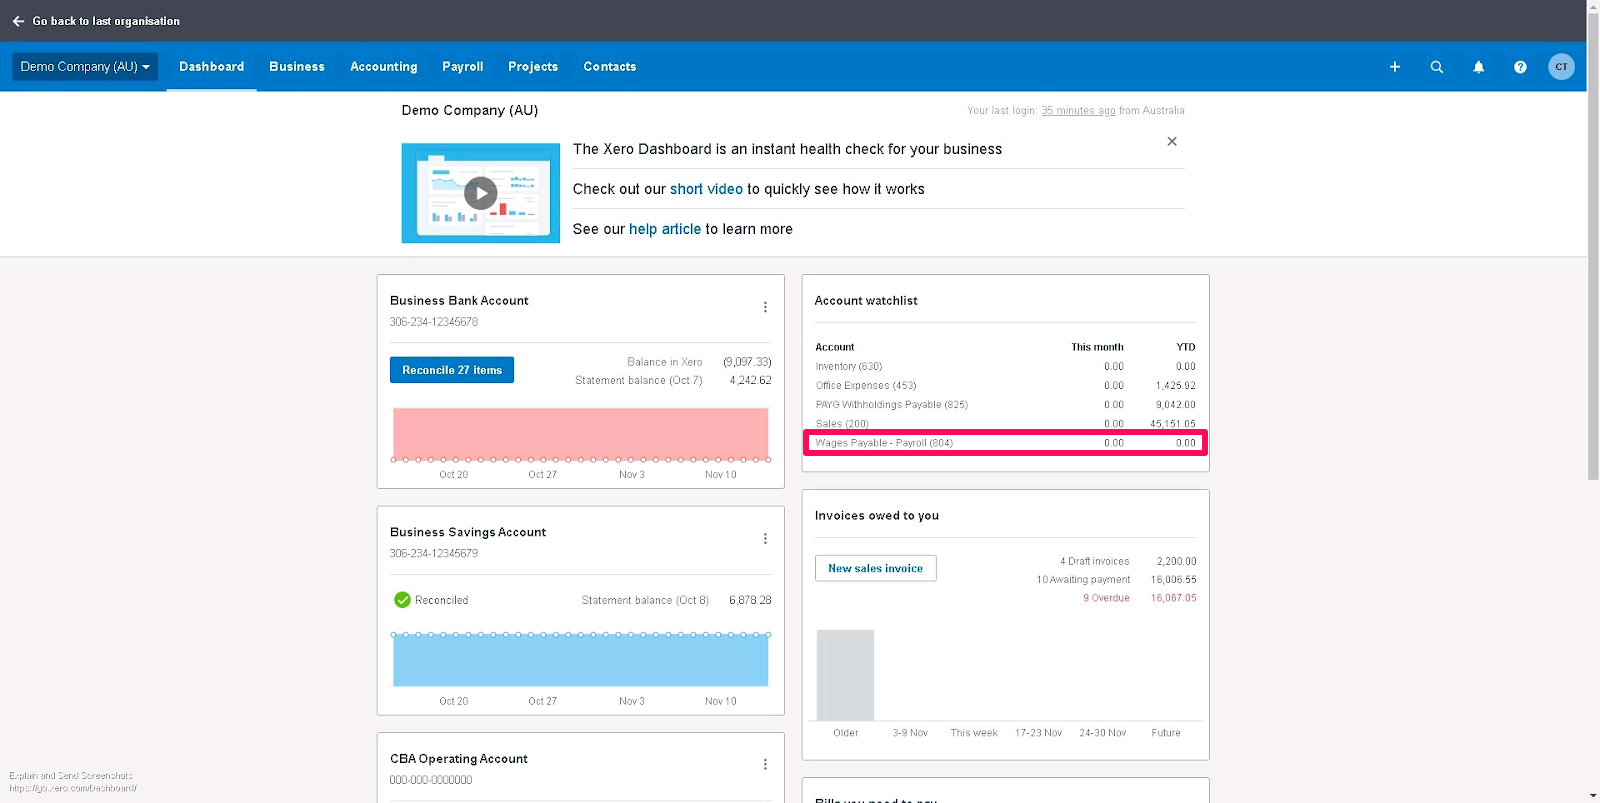
The 804 – Wages Payable account is the standard liability account in Xero however this can vary between organisations. If you are unsure which account you should use you can check this information in the payroll settings as below.
When the wage payments come through your bank feeds you code this figure directly to the appropriate liability account.
Once this has been completed the liability account should balance back down to $0. We recommend putting the liability account on the dashboard so you can determine if this account is being paid off correctly.
Enjoy payroll in Xero!
Zowie